 Ruthanne Dolezal
Here is an ornament I made this morning with 2"corners of a Christmas card envelope. The wire from a used 6" twist tie joins the top and bottom points and serves as a hanger. Thread and glass beads pull the horizontal points together.
I think there is a miniature world of origami possibilities using envelope corners. I hope to find time to explore it.
 Deanna Shouppe
Midlothian, TX 76065
This is my recycled Christmas ornament. I have been recycling glass jars b4 I knew that is what it was called. A list of what was used:
empty cleaned small glass jar (saved it from a travel vaca many years ago, it is a single serve condiment jar) jingle bell--from another project
gold top taken from the jingle bell a few inches of red ribbon- I had a piece left over from another project it was about 7 inches long and I kept it long so I could make sure I could tie many knots so the ribbon would not pull thru the hole in gold bell topper strong glue, I used e6000 that I had on hand but any super glue will do. red glitter paint/gel
First clean the jar very well, I always clean any glass surface with rubbing alcohol, gives me a really clean surface. I poured the red glitter paint, (I had this on hand, just the very end of the bottle, but one could use clear acrylic and glitter I suppose) and swirled it inside of jar with my finger so that I could be sure entire inside was covered with sparkle. After dry, which did not take long. Then I placed red bell inside jar. Meanwhile, jar was drying I "painted" with my finger the lid of the jar. When dry, I screwed lid on top. I used an a screwdriver to punch a hole into top of jar/center as best you can so ornament will hang well. Then double ribbon, and thread thru the underside of lid , thru the hole in gold bell topper and knot knot knot. I then placed a bead of glue onto ribbon to make sure knot will hold and then bead of glue around edge of gold bell topper and place
On top of jar lid. Viola, there you have a beautiful, wonderful ornament for zero money!
I hope you enjoy it. I hope I win! But if not, it is still worth it because you pushed me, my mind and imagination.
The brown snowman are sea beans that I collected on the beach after Hurricane Ike. I love rustic, natural look too. From one extreme to the other! LOL. My brown snowman was also free, I used a drill bit and kitchen twine. And came up with many other ideas but dh reminded me that I had gifts to make for our children so I had to get busy! Thanks again. If these pics are good, would you mind letting me know how I can take a better pic for web viewing. Oh yeah, my ornament holder, you are gonna love this, is an old, just had to have it, impulse item, a head massager, lol makes a great art piece!
 Tracie
Pinckney, Michigan
Plastic Bottles and some natural baby pine cones
Cut various plasitc bottle into circles then heated the circles up with a heat gun. Cut the bottom of a plasitc bottle then cut out the inside of it to make a "ring" shape. Hot glued the circle chips around the "ring" added the baby pine cones as well as some fishing line in order to hang on the tree
 Alyson Lamanes
Hamilton, Ontario Canada!
Ingredients used
cardboard box, paint, recycled notebook, pen, paper, glue, paint chips, yarn
General instructions for making
1. Draw a shape on the back of the notebook. Cut it out, then trace on the thicker cardboard. I used a thicker snack box, but any sturdier piece of cardboard will do. Make sure you cut a hole at the top so that you can attach a string or hook to hang it on the tree.
2. Draw a picture on the notebook side of the cardboard, and then trace it over with a piece of paper so that you have the same image of the two pieces of paper. Then lightly paint the cardboard so that the image doesn't show through as much.
3. Cut out each piece of the picture, trace it onto brightly coloured paint chips. Cut out larger pieces first such as the faces and hats, then layer them on top. (I'm a designer at heart, so every time I go to a hardware store, I always grab paint chips. They're always so bright, and I never find a use for them!)
4. Glue the pieces securely in place, and then glue the two pieces of cardboard together.
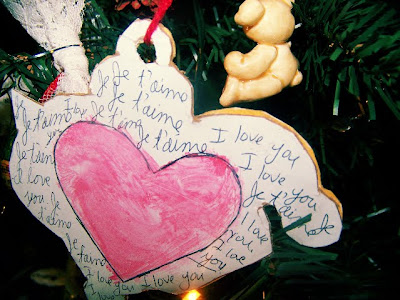
5. Feel free to do the same with the back, or decorate freely. On the back of mine I drew a heart, painted it red, and wrote "Je t'aime, I love you."
6. When dry attach string and hang!


Great projects!!
ReplyDelete