Monday, November 30, 2009
Parmesan Sage Custard Tart with Squash and Carmelized Onions
I hope you all had a fantastic holiday and long weekend. I have a few posts this week that will catch you up on how I spent the days, and the first one is the dish I made for Thanksgiving.
When I was deciding between recipes of squash tarts, I tried to choose the easiest one, both in terms of method and ingredients. That didn't actually turn out to be the case as this took me about three hours to make on Wednesday night, but thankfully it was a lot of inactive time (while the dough chilled at various points and I did other things like bake muffins). And it turned out so well—the crisp crust with a hint of sage, the smooth texture of the filling—that I would completely make it again.
Here's the link to the recipe which tastes a bit like quiche, but the rich filling is actually only one egg with a relatively small amount of cream steeped with parmesan, baked over squash and onions (I used more than they called for since I so love caramelized onions).
As I said, this is not a fast recipe, but some of the people who left reviews of it used pre-made crust which is a great option.
Don't forget: today's the last day to enter the Tiffani Taylor art giveaway!
Labels:
Food: Main Dish
Wednesday, November 25, 2009
A Few Thoughts on Gratitude
Yesterday I felt like I was back in school, eagerly awaiting a holiday break. I guess that feeling of anticipation never really goes away so I am thankful that we have a half day today. After I posted yesterday's giveaway, which you should TOTALLY enter if you haven't already!, I realized that I should also share what I'm most thankful for this Thanksgiving. So here, in no particular order, is where I'm sending my gratitude this year.
1. My creative community both here in Des Moines and online which is an endless source of inspiration and motivation.
2. Knowing that big changes that are made for the right reasons, even when they feel terrifying and seemingly crazy, have enormously positive payoffs.
3. For my friends near and far who make my world such an amazing place.
4. The support of my family.
5. My kitchen, which has given me space (literally, physical space) to explore my love of cooking and baking.
6. For love itself.
I for one am looking forward to a few days off and to a slice (or two) of pumpkin pie. I wish you all a wonderful holiday and I look forward to seeing you back here next Monday.
Image of Bourbon Pumpkin Pie via epicurious.
Tuesday, November 24, 2009
Gratitude with a GIVEAWAY from Tiffani Taylor Art
I am very happy to share another giveaway with you this week from my friend Tiffani Taylor who is an extremely talented painter and artist. She lives in Savannah and is inspired by nature, both what's in her own backyard and also what she sees when she travels.
She's generously offered a $30 gift certificate to her shop to one of my readers. Let's take a look at some of her work...
Winter birds notecards that would make for some lovely holiday cards.
An example of her selection of ornaments which also include ones for a new baby and a handful of ones in her signature floral style.
This is the type of image that I associate with Tiffani and I love seeing her poppies on a collection of bud vases.
Here's another signature of hers, her hydrangea. So you can see (oh, the first image is of a giclee- pretty remarkable, right?) that she offers a wide selection of work that I am confident you could find easily giftable.
Here's how to enter to win a $30 gift certificate to Tiffani's shop:
1. Post a comment about either what you're especially grateful for this year OR what food you are most looking forward to eating over the holiday. (You will be entered twice if you include both!)
2. For convenience if you should win, please feel free to email me your mailing address at thingswemake at gmail dot com. At the very least, you must post a comment with a username, rather than anonymously, otherwise I won't know who you are!
The contest will run for a week, so from today through 12am next Tuesday December 1 when I'll post the winner and share another great contest I'm co-hosting with Amy from Mod Podge Rocks. Good luck!
Labels:
giveaway
Sunday, November 22, 2009
Orange Cranberry Walnut Bread
For as long as I can remember, we've eaten this cranberry bread for Thanksgiving (and perhaps Christmas). My Dad's mom always made a bunch of loaves ahead of time that she'd carefully wrap in foil, label (the name in her script on an appropriately themed holiday label), and freeze until the holiday. My mom continues the tradition, serving it slightly chilled in slices with cream cheese on the side. Since I'm staying in Iowa for Thanksgiving this year, I thought I should make the bread too.
I made a loaf over the weekend to take to "friendsgiving" at my friend Brianne's house, which was a fantastic prelude with friends to the real event. I'll be making another to take to Thanksgiving on Thursday. It's interesting to me that it always tastes slightly different depending on who makes it, even though we're all using the same recipe. But it makes me happy to carry on such a deliciously easy tradition.
Cranberry Nut Bread
1 orange
1/2 c chopped walnuts
2 tbsp butter
2 c all purpose flour
1 egg
1/2 tsp salt
1 1/2 tsp baking powder
1/2 c sugar
1 c chopped fresh cranberries
1/2 tsp baking soda
1. Preheat oven 325. Butter a loaf pan and set aside.
2. Grate the rind of the orange and squeeze out juice into measuring cup. Add enough boiling water to make 3/4 cup. Add the orange rind and butter, stirring to melt the butter.
3. Beat the egg in another bowl and gradually add the sugar, beating well. Add remaining ingredients and orange mixture, blending well. Spoon into pan and bake 55-60 minutes.
Labels:
Food: Baking
Friday, November 20, 2009
Inspired Image: Calee's Quilt
Time for me to do an inspired image, mostly because I saw this image and felt a surge of inspiration.
This image comes from Calee of Chimes Design (it's her quilt) and Bethany (who posted the picture).
It inspires me because I love the way the texture of the quilt, the graphic print of the chair and the wood of the floor work so well together.
I particularly love that it transmits such a feeling of warmth.
It makes me feel like quilting (no surprise there!)
The 3 words it conjures up are comfort, rustic and modern.
I'd like to officially announce that if anyone reading this would like to participate in the Inspired Image series, I would love to have you. Just email me at thingswemake at gmail dot com with the answers to the questions above, along with your name and a website/blog if you have one and the image as an attachment. I'd love to see what's inspiring you!
My weekend plans include baking cranberry bread, going to the Holiday Promenade in the East Village tonight and Craft Saturday tomorrow. I hope you all enjoy yours!
Labels:
Craft: Quilting
Thursday, November 19, 2009
Scandanavian Heart Ornaments
I am completely obsessed with these Scandanavian Arctic Heart Ornaments. The shape, the colors, the texture, man oh man they make me happy. Created by the very talented Jaqueline Bos, who also does some incredible illustrations.
P.S. Learning about talented people like Jacqueline is one of the many reasons I love my job at ReadyMade. Ooh, which reminds me that if you are looking for an excellent girly DIY holiday gift to make, check out these velvet floral headbands and these fancy embellished tights over on the RM blog!
Labels:
Craft: General,
Craft: Illustration,
Home: Holiday
Wednesday, November 18, 2009
Improv Throw Pillow Covers
As I started writing this post, I was feeling embarrassed that I've been meaning to make these pillow covers since May. That's many months ago. But, then I decided that I am so happy with the results, so excited that I actually did finish them, never mind the time delay, that you're going to get me and my enthusiastic endorsement of my own handiwork.
You may remember that during Virginia's bachelorette scavenger hunt, we went to Purl Patchwork in NYC and she choose two yards of fabric that her sister Caroline and I would make into pillows for her as a memento of the day. I thought of the idea and figured that even though I'd never done this, pillows couldn't be that hard. And they're not.
Essentially (and this isn't a real tutorial since I kind of made it up along the way and thankfully it worked!), I cut the yard of fabric in half and used each half to make a cover for a 16x16 pillow. I did an overlapping seam on one side so that they are removable (and washable) but they didn't require zippers or any fancy fasteners. I used the pillow as my guide for how wide to make the covering and while they might not look entirely like something one would buy in a store, I think they are pretty nice for my first attempt. (Though to prove to you how little I know about sewing, I couldn't get my bobbin to catch, so I hand sewed them since that's what I'm more comfortable with anyway!)
So Virginia, as soon as I can find a box for these, they will be on their way to you. Just in time for you to start planning the living room decor of your soon-to-be new house. Maybe the timing on these worked out for the best after all!
Labels:
Craft: Sewing
Tuesday, November 17, 2009
Instant Heirloom: Porcelain Jewelry by Sofia Masri
Way back when I started this blog, Sofia was on my list of women to cover. I completely love her style and have always wanted to know more about her work. I'm not sure why on earth it took me so long to finally get around to doing a Q&A with her, but I am very pleased to present one today!
Sofia Masri
Location: Chicago
Find Me: sofiamasri.etsy.com; sofiamasri.com
Tell me a little bit about what you make.
I make jewelry out of porcelain clay! Every piece is a labor of love. From making the molds to glazing to assembly, I spend a lot of time making sure each item is just right.
How and when did you learn to work with porcelain?
It was an accident, actually. I studied fashion design and had my heart set on starting a clothing company. While I was saving up some money I began making beaded jewelry. My mom was working with mosaics at the time and persuaded me to take a porcelain tile making class with her. The light bulb went off immediately.
How did you come to focus on jewelry?
I'm very detail oriented so I wanted to make small objects full of texture and color. Having an interest in fashion, I naturally veered toward accessories. Jewelry seemed like such a perfect fit for the medium. Porcelain is refined and takes texture beautifully. It's lightweight and strong, and colors really pop on the white background. I knew right away that I wanted to make jewelry- never thought twice!
Would you call your process traditional or are you doing something innovative in terms of process?
The process itself is traditional. I make the pieces, let them dry, fire them in a kiln, glaze them and fire them again. It's the product of the process that's somewhat unconventional.
Where do you do your work?
I work out of my parents' house in the Chicago suburbs. They've graciously donated my old bedroom to the business. My mom (http://raquelmasri.etsy.com) also works there, she makes gorgeous housewares and has an awesome workspace! I'm hoping to graduate to a big girl studio this spring or summer.
Have you had any mentors along the way?
Not really, though I've always wanted one! Because I'm mostly self taught I haven't had the luck of finding a true mentor. It's tough to meet people when you're working in a room by yourself for the majority of the week. But if anyone reading this would like to send me some advice or direction I'm all ears!
How long does a typical project make or what's a range of time that some of the things currently in your shop take you to make?
Everything usually takes about two weeks from start to finish. In order to have full kiln loads, I need to work assembly line style. I'll begin by making a big batch of pieces out of clay, then I fire them all at once, glaze them all at once, etc. They also need time to dry properly. No rush orders here!
Where do you find your inspiration?
Mostly in the past. Fashion history, decorative arts, architecture, you name it. As long as it existed before 1940, I'm interested. I love antique stores and spend hours and hours looking at everything (and I mean everything, it's almost compulsive). I also find a huge amount of inspiration in film, especially period pieces.
What are some of your current favorite products that you're selling?
I have some new small necklaces making their debut in the Etsy store this week that I can't stop wearing!
Are you working on something right now that has you particularly excited?
Yes! I realized a little while ago how much I miss fabric. Specifically, I miss the smell of cotton under a hot, steamy iron. So after the holidays, I'll be working some fabric into my pieces. Also, starting in January I'll be creating two labor intensive one-of-a-kind pieces each month (a necklace and a pair of earrings) which will incorporate antique and vintage beads from my stash.
What's the best part of your day?
That's a tough one. I work best late at night to early morning. My schedule is completely backwards. At night, everything is quiet and there are no interruptions. I can work a ten hour stretch and it feels like three. Opening the kiln and seeing pretty, shiny glazed pieces is really exciting, too. It's like opening a treasure chest!
Is this your full-time work?
Yes it is, I quit my day job two and a half years ago and haven't looked back!
Sofia Masri
Location: Chicago
Find Me: sofiamasri.etsy.com; sofiamasri.com
Tell me a little bit about what you make.
I make jewelry out of porcelain clay! Every piece is a labor of love. From making the molds to glazing to assembly, I spend a lot of time making sure each item is just right.
How and when did you learn to work with porcelain?
How did you come to focus on jewelry?
I'm very detail oriented so I wanted to make small objects full of texture and color. Having an interest in fashion, I naturally veered toward accessories. Jewelry seemed like such a perfect fit for the medium. Porcelain is refined and takes texture beautifully. It's lightweight and strong, and colors really pop on the white background. I knew right away that I wanted to make jewelry- never thought twice!
Would you call your process traditional or are you doing something innovative in terms of process?
Where do you do your work?
Have you had any mentors along the way?
Not really, though I've always wanted one! Because I'm mostly self taught I haven't had the luck of finding a true mentor. It's tough to meet people when you're working in a room by yourself for the majority of the week. But if anyone reading this would like to send me some advice or direction I'm all ears!
How long does a typical project make or what's a range of time that some of the things currently in your shop take you to make?
Where do you find your inspiration?
Mostly in the past. Fashion history, decorative arts, architecture, you name it. As long as it existed before 1940, I'm interested. I love antique stores and spend hours and hours looking at everything (and I mean everything, it's almost compulsive). I also find a huge amount of inspiration in film, especially period pieces.
What are some of your current favorite products that you're selling?
Are you working on something right now that has you particularly excited?
Yes! I realized a little while ago how much I miss fabric. Specifically, I miss the smell of cotton under a hot, steamy iron. So after the holidays, I'll be working some fabric into my pieces. Also, starting in January I'll be creating two labor intensive one-of-a-kind pieces each month (a necklace and a pair of earrings) which will incorporate antique and vintage beads from my stash.
What's the best part of your day?
Is this your full-time work?
Labels:
Craft: Personal Accessories
Monday, November 16, 2009
Weekend Project: Experimental Apple Cake
And what a project it was! I had it in my head that I wanted to make apple cake, who knows why, so my mom sent me my great grandmom's recipe that I ate a lot of as a kid. I remember it fondly, but when I looked at the recipe, I was a little put off my the amount of oil since I really wanted to be able to eat this cake for breakfast. So I decided to change things up a bit (albeit with limited recipe developing skills), subbing in some yogurt for half of the oil, switching to whole wheat pastry flour and reducing the sugar drastically. Oh! And I added a topping, cause you know, it sounded like a good idea. Here's the original recipe in case you would like to make it. It's delicious.
Preheat oven 375)
Spray a tube pan (or 2 loaf pans)
5-6 large apples (granny smith) peel and slice thinly
Mix apples in cinnamon and sugar
Mix together 3 cups flour
2 cups sugar
1 cup canola oil
4 eggs
1/4 cup Orange juice
3 tspns. Baking powder
2 1/2 tspns. Vanilla
Pinch of salt
Alternate batter,apples,batter,apples in pan.
Bake for 1 1/2 hours or until cake tester comes out clean- may take longer-you do want it nice and brown- just keep an eye on it! ENJOY!
And here's what I did:
Preheat oven 375
5-6 large apples (granny smith and honeycrisp) sliced thinly (I left the peel on)
1tsp cinnamon
3 cups whole wheat pastry flour
3 spoonfuls sugar
1/2 cup honey
1/2 cup canola oil
1/2 cup plain yogurt
4 eggs
1/4 cup orange juice
3 tsps baking powder
2 1/2 tsp vanilla
Pinch of salt
Topping:
1 cup rolled oats
1/4 cup melted butter
2 tsp cinnamon
2 tbsp sugar
2 tbsp whole wheat pastry flour
1. Lightly oil a deep baking sheet (it was the only pan I have that would hold the amount of batter- traditionally, as my mom said, this is done in a tube pan, like what you'd use for Angel Food cake).
2. Mix the apples with the cinnamon and 3 spoonfuls of sugar. Set aside.
3. Mix the dry ingredients in a bowl and the wet ingredients in another. Slowly incorporate the dry ingredients into the wet being careful not to over mix.
4. Alternate batter,apples,batter in pan. Mix topping together and spread and press lightly into the batter.
5. Bake for 45-50 min** or until cake tester comes out clean- may take
longer-you do want it nice and brown- just keep an eye on it!
ENJOY!
**I baked mine, again in a somewhat shallow pan, for an hour and it was about 10 minutes too long. The bottom is a tad darker than it should be (though it's actually not as dark as it is in the picture), so if I make this again, which I imagine I will, I will aim for closer to 45 or 50.
I realize that baking is a science, and changing recipes can easily result in disaster, but I've decided that it's sometimes okay to take some liberties with recipes. In this case, I tried to keep the ratio of wet to dry the same, I knew I'd be okay with any texture differences caused by using whole wheat flour, and I tasted the apples and decided that they didn't need two cups of sugar—they were plenty sweet. Apart from the fact that I baked it a bit too long, it's really delicious and I ate it for both breakfast and lunch yesterday. I love the crunch of the topping and the fact that while it's definitely different, the flavor memory of the cake I ate as a child is still there. I'm sure I'll make the original someday too, but this was a really fun experiment.
Labels:
Food: Baking
Friday, November 13, 2009
Inspired Image: Freda Cheung of Etsy Shop Mykonos
Hello, my name is Freda Cheung.
You can find me at mykonos.etsy.com or mykonos.wordpress.com
This image comes from Iker of flickr photostream
It inspires me because of the historical culture and mysterious stories of the God of Greece, Zeus, Hades, Athena, Apollo, Eros ...it's always attractive and inspires me a lot!! Greece is my favourite place in the world and that's why I choose "mykonos" to be the name of my etsy shop.
I particularly love the sleeping dog and the blue and white houses, you can breath and feel like a flying bird there!!
It makes me feel comfortable and relaxed (compared with the environment in Hong Kong). I hope I can live there when I retire!!
The 3 words it conjures up are peace, historic and romantic.
Freda sells vintage inspired jewelry and trimmings in her etsy shop. Here's a look at some of my favorites...
I love her mixture of colors on these- so bright and energetic.
Have a great weekend everyone!
Thursday, November 12, 2009
Crocheted Lovlies from Namolio
I came across these pincushions earlier this week and they are so intricate that I am suddenly more curious about crocheting. That might be the technique I try to learn next, but in the meantime, I'm just going to enjoy the work of other people!
These are made by Namolio on etsy, who is a maker in the UK. She is a photographer and graphic designer by day and an artisan by night. Take a look at some of her other works that look just perfect for the approaching winter.
Thin crocheted scarves which are just an example of the types of scarves she makes. She has some wider ones and also some, including a lovely gray one, that are shawls.
Hair pins, ponytail holders and brooches with delightful little flowers.
She also knits scarves, like this one in lovely autumnal colors. To see more of her work, check out some of her crocheted blankets on Real Simple's Simply Stated blog.
Wednesday, November 11, 2009
Chocolate Chunk Oatmeal Cookies with Dried Cherries and Pecans
The name of the cookie makes me giggle every time I say or write it because it's about as long as the cokies are enormous. The truth is that just ats they are the most visually impressive cookies I have ever baked. And they are pretty tasty too- I have decided that adding dried cherries to cookies with chocolate is an excellent idea, as is making cookies with a texture that is smack in the middle of an oatmeal raisin and a chocolate chip.
If you read my food posts over on readymade.com (if you don't, please join the fun over there!) you may remember that I selected Seven Spoons as last week's blog of the week. I am smitten with the site and made these cookies the same night I found them. Which is rare for me, but my mom was visiting and I needed a thank you present for a friend, so I guess you could say that the stars aligned for baking. I had the urge to add coconut to the cookies, but the dough was kind of hard to mix since it was so full (I may have added extra chocolate chips...) so I decided to stick to the instructions for my first attempt.
As you can see, they are big. My mom kept saying that they looked like cookies you could buy at a bakery, which I think is the highest praise. But as my status as a cookie-baking novice should tell you, these are super easy, so I highly suggest you try them out the next time you need a gift or an easy dessert. Or, of course, just a good homemade cookie to eat yourself.
Here's a link to the recipe, which originally appeared in Cook's Illustrated. My picture was taken during our picnic lunch break at the Neil Smith. Right before we went buffalo watching.
Labels:
Food: Dessert
Tuesday, November 10, 2009
Instant Heirloom: Rose Lullaby Dolls
Today's Instant Heirloom is absolutely fascinating to me and my lack of puppet and doll making knowledge. The doll above is so charismatic and full of positive energy (hmmm, I wonder how much that has to do with the fact that her hair looks like mine!) that I'm sure you'll love hearing more from Robyn, the woman behind the creations.
Name: Robyn Wilson-Owen
Find me: robynlouisewilson.blogspot.com, www.roselullabydolls.etsy.com, facebook.com/roselullabydolls, twitter.com/roselullabydoll
Location: North London, England
Tell me a little bit about what you make.
I make paper sculpted dolls and rod puppets from twigs, masking tape, string and tissue paper. I then give them hair made from string or wool and clothes made from my wardrobe full of fabric.
How and when did you learn to make dolls and puppets?
I use a lot of different skills to make them, which I've learn through a lifetime of making. I learnt the technique of sculpting with masking tape at Norwich Puppet Theatre, learning that technique was a real 'light bulb' moment. I also use my dressmaking skills which I learnt when training as a Costume Designer. Each puppet and doll is made slightly differently and I use a lot of the skills I learnt through a childhood making things with my very artistic mother.
Would you call your process traditional or are you doing something innovative in terms of process?
Puppets and dolls are amongst the oldest forms of art and craft, there are pieces in the Egyptian section of the British Museum which have informed my work. The way I use masking tape and tissue paper is rather unusual however.
Where do you do your work?
Everywhere! I always have a few twigs and a roll of masking tape with me and sit making puppets and dolls on the tube, in the park, anywhere I get a spare few minutes. I have a desk in our spare bedroom at home where I do the finishing work, unless there's something good on tv - then I'm downstairs!
Have you had any mentors along the way?
The puppet makers of Norwich Puppet Theatre are truly awesome, as are those at Little Angel Puppet Theatre.
How long does a typical project make or what's a range of time that some of the things currently in your shop take you to make?
I can make a puppet or doll in a day, with plenty of tea.
Where do you find your inspiration?
Everywhere, it's 50% from faces I see around London, people watching on the tube, and 50% from the materials I find or have around me - 'Lee' who is currently in my etsy shop has a chin which was dictated by the shape of the twig he's made from. I like to work with what I have, I rarely buy things specifically for a piece, I buy bits and pieces and they eventually find their place.
What are some of your current favorite products that you're selling?
I really love Lee, I'm really pleased with the shape of his head and his skin tones. (That's Lee, shown above.)
Are you working on something right now that has you particularly excited?
I'm planning on developing a line of really tiny dolls, and I have recently been given some opportunities to sell my work locally which are really exciting
What's the best part of your day?
Making a puppet while my 2 year old daughter wraps tape round her own twig to make a 'little man' as she calls them.
Is this your fulltime work?
My fulltime work is being a Set Costume and Puppet Designer and Maker for Theatre, so this is an extension of that, this is where I get to make the characters that I don't get the chance to for theatre.
Monday, November 9, 2009
Field Trip: Neil Smith National Wildlife Refuge (and Buffalo!)
My parents were visiting this weekend which meant a lovely Italian meal at Lucca, breakfast and baked goods at La Mie, baking cookies, searching out the Penn State game (which is not such a popular team here in the middle of Iowa) and an outing to the Neil Smith Wildlife Refuge and Prairie Learning Center on Saturday.
The Neil Smith is a 5,000 acre restored prairie—back to the way the landscape was in the mid-1800s when the first settlers came here—and wildlife refuge about 30 minutes away from Des Moines. One of the things that's been a little hard to get used to here in Iowa is that it seems like all of the land is either being farmed or has been developed. There is a real lack of open space, so spending time here was a real treat.
The learning center had some great exhibits (that are, not surprisingly, geared towards all ages, so we were looking through a root system area with a boy scout group) and the building was impressively built to suit the landscape.
And there were buffalo! We went on a walk around the prairie hoping to see some animals (they have buffalo, elk, white-tailed deer, pheasants) and we were lucky to see buffalo. My parents, who had no idea that they'd be doing this on their visit, were very excited to be able to bring this story home with them to New Jersey.
I'm definitely planning to go back and visit in the spring because while it was beautiful with the golden colors, I can only imagine how lovely it would be when the grass is all in bloom.
Friday, November 6, 2009
November Print of the Month: Pattern Block by Yellow Lion
We recently had some of Yellow Lion's prints in our office and I was so taken with the texture and the colors of them that I knew I had to make one of them a print of the month. This one is monochromatic but filled with interest and it reminds me of quilting or embroidery stitches, with a touch of American folk art. Here's a bit about the maker:
I am a mama and a graphic designer working in Chicago with a love for screen printing. I learned the process about a year and a half ago and am so grateful for the wonderful break from the computer! I did tons of photography, b/w and color, in college and sadly don't have access to a darkroom anymore. So the methodical screen printing patterns suit me very well.My parents are in town, so I'll be spending the day with them tomorrow (and giving my seminar at Metro Arts Expo on buying affordable art- come by at 10 am if you are in town!) and I hope you all have an equally great weekend.
I absolutely love creating art and am glad for the chance to get it out to the masses. Nature serves as my inspiration and I love making things for my home.
Labels:
Craft: Illustration,
Craft: Paper Goods
Thursday, November 5, 2009
Pincushions (and More) by Handmade Pretties
A few weeks ago when I was watching Ephemera, I was in need of a birthday present for my sweet sis. I'd had my eye on a pincushion in the shop for a month or so and while I realize that a pincushion might not be a go-to birthday gift, I decided that since it brought me so much joy and my sister sews, surely she'd like it too. It was hard not to keep it for myself, but I paired it with a little felted hair clip and send it on its way.
The pincushion that I sent to Katie, as well as the two that are shown here, are made by Lara of Handmade Pretties here in Des Moines. Ephemera sells many of her products, all of which show off her talent for giving materials—old sweaters, fabric scraps—a new life.
Here's how Lara describes what she does:
I have been making things with my hands for 30 years. Nothing brings me greater joy than finding yet another way to reuse something that I would typically throw away. For example, I have discovered unlimited possibilities for the cut up sweater. Whenever possible I strive to reuse and rescue materials. I rarely, if ever, purchase new packing materials (my materials are always clean!) b/c there are SOOOOO many bags, boxes, and pieces of paper out there waiting to be reused!
I am originally from Des Moines, Iowa, but relocated to Los Angeles to attend graduate school at Cal Arts. Due to my gigantic student loan debt and my two lil' darlins, I started making accessories, baby things, and other handmade objects to make a little extra cash. In 2007 we moved back to Iowa because my craft lair was starting to take over our tiny little bungalow in Los Angeles (you know tiny pieces of felt here, twinkling glitter crusted dust bunnies there). Now I spend countless evenings from 9 o'clock to 2:30 AM sewing and stuffing and cutting my way to happiness (or pure exhaustion...)I am pretty sure much of her work is seasonal (the pincushion I bought was cotton), so I can't wait to keep an eye on her products as time goes on. I am so glad that I discovered such a talented local artist! And, um, I might need to get myself my own pin cushion so I can stop coveting the one I sent my sis.
Labels:
Craft: Sewing
Wednesday, November 4, 2009
Mom's Quilt Update #7
I am at the quilting halfway point! One of the reasons I decided to make this a small project was in the hopes that I would finish sooner, but alas, that's not really happening. (The downside of doing more than one project at once, and also quilting by hand.) That said, I am loving how this is turning out and I am thoroughly enjoying spending time with the pretty fabric.
There's a close up for you to see. I think since this one and my quilt for Katherine are so heavily quilted, I might try to use larger pieces in whatever I make next.
And here you can see one side quilted, one side waiting for its turn in the quilting hoop. I'm going to try to focus on this one in the hopes of finishing it in the next two months, then I will most on to my other quilt. Hopefully I'll be able to post another update soon!
Labels:
Craft: General,
Craft: Quilting,
Craft: Sewing
Tuesday, November 3, 2009
Happy Opening Day Ephemera!
My lovely friends Karen and Arin of Ephemera, who I have mentioned here numerous times, are flinging open the doors of their new shop space today. It's around the corner and down the street from their current location and the space is possibly three times the size. Which means plenty of room for more handmade merchandise and classes galore!
Anyway, these ladies form the heart of my circle of creative friends here (everyone knows them for good reason!) and I am so excited for them and all of their plans for the new space. The card above is one of their designs and I think the quote is very appropriate for today:
Time does not change us. It just unfolds us.Ladies, I look forward to seeing where all of the unfolding takes you!
Labels:
Craft: Paper Goods
Sunday, November 1, 2009
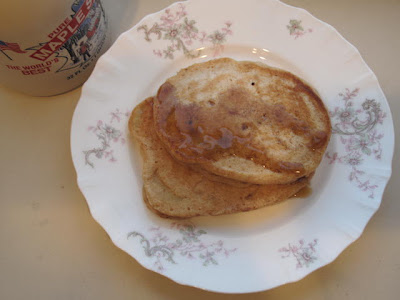
Weekend Breakfast Heaven: Banana Pancakes
I can't believe that I'm about to admit this, but I'm pretty sure this weekend was the first time I've ever made pancakes from scratch. Part of this is due to the fact that usually, the only time I make them is when I'm at my parents house (because then there are more people to enjoy them). My mom buys a buckwheat pancake mix that we like a lot, so there's never been a reason to make them from scratch. But that changed on Saturday when I woke up with a serious pancake craving. I opened How to Cook Everything and realized that pancakes are ridiculously simple: 2 cups of flour (I used 1 c whole wheat and 1 c all purpose), 1.5 cups of milk, 1 tbsp baking powder, 1/2 tsp salt, 2 eggs, 1 tbsp sugar, and if you're like me, a few dashes of cinnamon and a thinly sliced banana. That's it! (This is not news, I know, but I just can't believe I'd never made them before, especially after reading the recipe.) I used my Lodge cast iron griddle, the last bit of the maple syrup that I brought with me from New York, and it was weekend breakfast heaven. I'm very excited to enjoy the few that are left in my freezer through the course of this week.
My other weekend highlight was that I made much progress on my mom's quilt. I will post a picture of it later this week!
Labels:
Food: Breakfast
Subscribe to:
Posts (Atom)